Monday, November 06, 2006

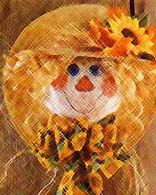
Kid's Thanksgiving Crafts Scarecrow Hat

1 Large Straw Hat
1 Small Straw Hat
Hot Glue Gun
Decorative Crafting Ribbon (3 yards)
Dried Wheat Sprig and Silk Flowers
1" or 2" Sponge Brush
Med. Stipple Brush
Natural Colored Raffia
Permanent Black Marker or Paint Pen
Acrylic Paints- Orange, Flesh Color or Off-White, Red and other Harvest Colors
Clear Coat Spray Sealer

Start by cutting the small straw hat in two right down the middle leaving half the brim and crown of the hat on one side and half on the other side. You will only need one side for this craft.

Next, paint the crown of the large straw hat flesh color or off-white using your sponge brush. This will be the scarecrow's face. Do not paint the brim of the large hat, leave it the natural straw color to match the small straw hat.

After the paint has dried. Paint on the rest of the scarecrows facial features. This part can be as easy or as advanced as you want it to be. For a simple scarecrow, painting the nose red or orange in the shape of a triangle. (pointy end up) Eyes can be oval or triangle shaped as well. Always allow one color of paint to dry before applying the next.

To paint the cheeks, use a dry stipple brush and work off most of the red paint blotting it on a paper towel. Using a pouncing motion gently pounce the cheeks in a circular motion. Feather lightly around the edges.

Using a black paint pen or sharpie permanent marker, outline the nose. Then, lightly draw a black line down the center of the face on either side of the nose. Add fun stitch marks to the dividing face seam line and around the nose if desired. Next draw on the mouth to connect the cheeks. You may want to dot a white glint in the eyes with the end of a paint brush and highlight the nose also for an added dimensional touch.

To protect the paint for many years of inside and outside decorating, lightly spray the face with a clear coat spray sealer found at hardware and crafting stores. Do not spray a heavy coat. Many black paint pens will run if sprayed to heavily. Several light coats of spray is sufficient.

Hot glue the cut small straw hat to the top the painted scarecrow face. Cut small bunches of raffia and hot glue in sections to either side of the scarecrow face. Full straggly raffia will cover any of the seam lines and give a finished look.

Embellish the scarecrows new hat by hot gluing silk flowers and a wheat sprig to one side of the small hat. Silk sunflowers or rusty colored chrysanthemums look especially cute!

Last, make a large bow with crafting ribbon and glue it under the scarecrow's chin.

You can hang your scarecrow on the wall or on your front door to greet your guests.

You can hang your scarecrow on the wall or on your front door to greet your guests. You could also wire the scarecrow head to the top of a cross post and dress a real scarecrow body for a yard decoration.

Kid's Thanksgiving Crafts Indian Necklace


Large needle
string or fishing line
popped corn
raisins or dried cranberries
Optional items:
nuts, pieces of orange peel,
dried apple or apricot

Measure the length of line that you need to fit the necklace over the head. Don't forget to leave enough for tying off. Thread the needle and string the popcorn and other items alternately. When we were done we all made Native American head bands and wore them both for most of the day. Afterwards hang the necklace onto a tree or shrub for the local wildlife. Tip: The orange peel adds a very pleasant scent. Put a bit of all natural peanut butter on the necklace before placing it outside. The oils and protein are great for the birds!

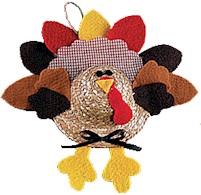
Kid's Thanksgiving Crafts Turkey Straw Hat

Kid's Thanksgiving Crafts String of Leaves


Construction paper (orange, red, yellow, brown, and other earth tones)
Crayons or markers
Scissors
Glue, tape, or staples
A long piece of green or brown yarn or string


Draw a leaf on a piece of construction paper. Make sure to draw a thick stem on the top (your leaf will hang from this stem, which will be folded over). If you'd like, use a leaf template.
Cut out the leaf. Draw the leaf veins if you wish.
Fold the leaf's stem in half.

Attach the leaf to a long string using tape, glue, or staples. Make more leaves and attach them to the string.

Kid's Thanksgiving Crafts Thankful Leaf Wreath


A plain white paper plate
Construction paper (orange, red, yellow, brown, and other earth tones)
Crayons or markers
Scissors
Glue or a glue stick

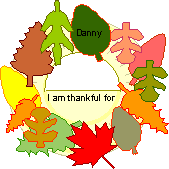
Cut a half circle out of the center of a plain paper plate. This will hold the leaves. Cut out a lot of leaves from construction paper. Draw the leaf veins if you wish.
Glue the leaves all around the rim of the paper plate.
In the lower center of the wreath, write, "I am thankful for," and then let the child write or draw what they are thankful for.
Put the child's name on the wreath (or let them sign it).

For variations on this wreath: instead of using leaves, use cut-out handprints of the child, tissue paper baking cups or torn-up scraps of paper.

Kid's Thanksgiving Crafts Scarecrow


Construction paper
Pencil
Glue
Scissors
Markers or crayons
Optional: googly eyes
Optional: real straw or raffia

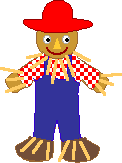
Cut out the scarecrow, shirt, overalls, shoes, and hat.
Color and decorate the clothes using crayons or markers.
Glue the clothes on the scarecrow. Optional: glue on some straw (real straw, raffia, or thin strips of light brown paper) at the edges of the clothing.
Add eyes, a nose, and a mouth.

This scarecrow makes a fun Thanksgiving decoration

Kid's Thanksgiving Crafts Pilgrim


Printer
Construction paper (black, white, yellow, and pink for the Pilgrim + a piece of paper for the background)
Pencil
Glue
Scissors
Markers or crayons

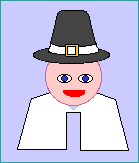
Trace the hat on black construction paper. Trace the face on pink construction paper. Trace the collar and hat band on white construction paper. Trace the buckle on yellow construction paper.
Cut out the pieces.

Assemble the Pilgrim and glue the pieces onto a piece of background paper. Let older students figure out what order they should place the pieces (collar first, then head, hat, hat band, then the buckle).
Using crayons or markers, draw eyes, a nose, and a mouth on your Pilgrim.
This pilgrim makes a nice Thanksgiving decoration.

Kid's Thanksgiving Crafts Turkey Hand Decoration


Brown, red, orange and yellow construction paper
Pencil
Scissors
Glue
Googly eyes (optional)

Trace around the child's feet using brown construction paper. These two pieces will be the turkey's body.
Trace around the child's hands using red, orange, and yellow construction paper. These 6 pieces will be the turkey's feathers.
Glue the two footprints together to make the turkey's body. (The heels make the head area.)
Cut out a round wattle and an orange beak. Glue the wattle, beak, and googly eyes (or paper eyes) to the turkey's head. Make two legs from paper and glue then to the back of the body (or use pipe cleaners and tape them to the back).
Glue the handprint "feathers" to the back of the turkey.
You can now decorate your house for Thanksgiving with these cute turkeys. Don't forget to put the child's name and age on the back of the turkey

Kid's Thanksgiving Crafts Turkey Gloves


Pair of knit gloves (brown, orange or other fall color)
Felt - yellow, orange, white, black, goldenrod, tan, red, and brown
Washable fabric glue or hot glue
scissors
plastic wrap


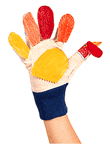
Stuff fingers and palm of glove with plastic wrap. This will keep the gloves from sticking to themselves during the gluing process.
From goldenrod felt, cut out 2 oval shapes for the turkey's head, about 2" high and 1.5" wide.
From red, yellow, brown, and tan felt, cut out 3" long strips. Cut points at the end.
Cut 2 small triangles from the orange felt, about ¾" inch in size.
From red felt, cut 2 elongated heart shapes about 1.5" long.
From white felt, cut two 1" ovals, and from the black felt cut 4 small ovals for the eyes.
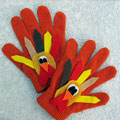
Lay all the pieces out on the glove first, following our photo as a guide. Once you have them in place, glue in place in the following order:
First, glue the strips in place for the feathers.
Next, glue the "head" on, then the red "gobbler" (heart shape).
Now glue the white and black pieces on for the eyes.
Finish the face with the orange "beak".
Allow glue to dry completely.
Remove all plastic wrap from the gloves.

Kid's Thanksgiving Crafts Turkey Greeter


10 jumbo craft sticks
2 medium wiggle eyes
Miniature craft stick
Small scrap of paper
Sharpie marker
Felt - white, black, goldenrod, and red
Acrylic paint - brown, orange, yellow, and red
scissors
Hot glue or white craft glue


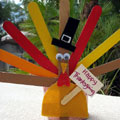
Paint the jumbo craft sticks: 4 brown, 2 yellow, 2 red and 1 orange. Leave one unpainted.
Cut ½ an egg shape (body) from the goldenrod felt, approximately 2.5" high by 3" wide.
Cut a small elongated triangle from the goldenrod felt for the beak.
From red felt, cut an elongated heart shape, about 1" long.
From black felt, cut a simple top hat and a small rectangle for the buckle.
From the white felt, cut a small rectangle for the buckle a little bit larger than the black one.
Lay the plain jumbo craft stick on the table. This will be your base stick.
Starting from the right, glue craft sticks into a fan shape, stacking one on top of the other as you go. Our pattern goes brown, yellow, red, brown, yellow, red, orange, brown.
You should have one brown craft stick left over. This is your turkey's body. Glue it straight up and down onto the middle of the fan shape.
Glue goldenrod body in place. Next, glue the gobbler (red heart) just above the top of the body.
Glue the beak in place just above the gobbler.
Glue wiggle eyes above the beak.
Glue hat onto top of head, then glue white rectangle on hat and black rectangle onto the white one, creating the buckle.
Write Happy Thanksgiving on a small piece of paper or construction paper. Glue to miniature craft stick, then glue craft stick to body.
Allow to dry completely

Kid's Thanksgiving Crafts Turkey Centerpiece


Large brown paper bag
Piece of corrugated cardboard
Paper plates
Stapler
Mod-Podge glue
Colored paper
Orange or red balloon and googly eyes
Glitter, stickers, or other notions
Craft clothespins
Tacky glue

Time needed: About 1 Hour
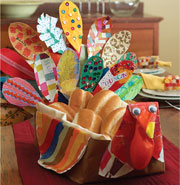
1. The Turkey's Body:
Trim the bag so that it measures about 8 inches tall. Then fold down the sides so that they are half the height and double the thickness. Cut the cardboard to fit in the bottom of the bag and insert it. Next, fold a paper plate in half and fit it inside the bag where the tail will go, bending the sides as needed.

2. Staple the plate in place. Then staple a second plate (don't fold this one) to the outside of the bag behind the first plate. For wings, fold 2 paper plates in half and staple one to each side so the bag is sandwiched between it.

3. For the turkey's head, fold and staple another paper plate, as illustrated. Decorate all the paper plates, including the head, by gluing on torn bits of colored paper. Then add a balloon wattle and googly eyes.

4. The Feathers:
Have your kids glue colored paper shapes on paper plates, layering different prints or creating bold patterns if they like.

5. When the glue is dry, cut feather shapes out of the plates and stick a craft clothespin to the back of each with tacky glue so your child can attach the feathers to the paper plates. For an extrafancy finish, they can add decorative notions or even their names.

Kid's Thanksgiving Crafts Turkey Puppet

Kid's Thanksgiving Crafts Turkey Puppet


Gardening glove
Colored felt
Glue
Paint or liquid embroidery (available at craft stores)
Googly eyes

Time needed: Under 1 Hour
1. Use the gardening glove for the bird's body. Cut feathers out of felt (make them a bit wider than the glove fingers) and fringe the edges. Now, glue one to each glove finger.

2. Next, cut a wing shape out of felt and glue it to the palm of the glove. Use paint or liquid embroidery to enhance the plumage.

3. To make the turkey's beak, cut out a pair of small felt triangles and glue them to opposite sides of the thumb tip.

4. For the wattle, cut a 2-inch-long hourglass shape out of red felt. Drape the wattle over the base of the beak and glue it in place. Glue on googly eyes.

5. To use the turkey puppet as a table decoration, stuff newspaper into the glove and roll up the cuff.

Kid's Thanksgiving Crafts Table Placecards


Kid's Thanksgiving Crafts Table Placecards

Tan polymer clay, approximately 1 ounce per foot base (we used Premo by Sculpey in ecru)
Butter knife
Cloth-covered floral wire, 20-gauge
Wire cutters
Mini clothespins
Scissors or pinking shears
Card stock in 6 colors, including light brown, tan, white, and red
Double-sided tape
Tacky glue
Black marker
Colored marker or crayon (for writing name cards)

Time needed: About 2 to 3 Hours
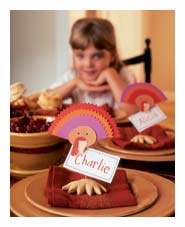
1. For each turkey, mold 1 ounce of polymer clay into a 1/2-inch-thick fan shape, as shown, then use a butter knife to cut V shapes for toes. Make a small hole in the middle of the foot base by pushing floral wire halfway through. Be sure not to press the wire all the way through. Remove the wire and bake the base according to the package directions.

2. Meanwhile, push one end of a 6-inch piece of floral wire through the metal spring of a mini clothespin (the beak), bend it around the pin, and twist it back around the wire. Next, use scissors or pinking shears to cut out 3 semicircles in graduated sizes from different colors of card stock. Cut a small light-brown oval for the head, a tan beak, and a red wattle.

Kid's Thanksgiving Crafts Turkey Placecards


Nontoxic ink pad
Blank place cards
Markers

Time needed: Under 1 Hour
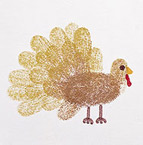
1. Press a thumb into the inkpad and then on paper to print a turkey's body. Use the same technique with fingertips to create a head and feathers.

2. Use markers to add a beak, wattle and feet.

3. Complete the cards by writing in guests' names.

Kid's Thanksgiving Crafts Turkey Pinata

Kid's Thanksgiving Crafts Turkey Pinata

Batch of papier-mâché
14-inch balloon, inflated
10-inch-wide bowl
1 two-page spread each of regular newspaper, comics, and plain newsprint, torn into 1 1/2- by 11-inch strips
String
9-inch orange balloon, inflated
Cloth tape
Black marker
White paper
Scissors
Yellow construction paper
9-inch red balloon, not inflated
20- by 30-inch sheets of tissue paper: 1 red, 1 yellow, 3 orange, 2 brown
Stapler
Glue
Wrapped hard candies

Time needed: Afternoon or Evening
1. Mix up a batch of papier-mâché.

2. PIÑATA BASE: For stability, place the inflated 14-inch balloon in a 10-inch-wide bowl. Drag a strip of newspaper through the paste, wipe off the excess with your fingers, and place it at an angle on the balloon. Place a second strip so that it slightly overlaps the first.

3. Continue until the balloon has been covered except for a 2-inch square at the top, through which the candy will go. Allow 24 hours to dry. Cover the leftover paste with plastic so it doesn't dry out (if it does, add warm water) and refrigerate.

4. PIÑATA HANGER: Wrap the middle of a length of string around the bottom of the balloon, pulling the ends up to the top; tape it to the balloon in a few places. Knot together the ends of the string 6 inches above the square opening.

5. Cover the balloon, including the string but not the square opening, with a layer of comic strips that have been dipped in the paste, placing them at a different angle from the first layer. (The colored strips help you distinguish one layer from the other.) Next, cover the balloon with strips of plain newsprint going in a third direction. Smooth over any rough edges as you work. Allow the papier-mâché to dry thoroughly.

6. THE HEAD: Once the papier-mâché has dried, hang the piñata from the string to decorate. Tape the orange balloon head to the wider end of the pinata with cloth tape. To make the eyes, draw two circles on white paper, then draw a black pupil in the center of each. Cut out the two circles. Tape them to the face of the orange balloon with loops of tape.

7. To make the beak, fold a small piece of yellow construction paper in half. Cut out a 3-inch-long triangle at the fold. Tape the beak and the red balloon (for a wattle) to the orange balloon.

8. THE TAIL: Overlap three full sheets of tissue paper (one each of red, yellow, and orange) so that the top inch of each sheet is visible. Next, fold the stack in half so that five strips of color are visible. Fold lengthwise accordion style. Gather the paper together along the bottom edge to form a fan. Staple to secure. Tape the fan near the knot end of the piñata body.

9. LEGS: Cut two turkey feet and two 14- by 1 1/2-inch strips for legs from the yellow construction paper. Accordion-fold the strips, then tape the feet to one end. Tape the tops of the legs to the underside of the piñata.

10. FEATHERS: Cut the remaining sheets of tissue paper lengthwise into 4-inch-wide strips. Next, fringe each strip with 2 1/2-inch-long slits set an inch apart. Cover the uncut portion of each strip with glue. Stick the strips to the piñata so that the fringe sticks up. This will provide the feathers with lift so that they stick out. Layer the strips horizontally from bottom to top until the entire surface, except for the opening, is covered.

11. After decorating the piñata, pop the balloon and remove all the fragments. Fill the turkey halfway with candies, cover the opening with tissue paper, and it's ready to hang.

Kid's Thanksgiving Crafts Turkey Nut Holder


Kid's Thanksgiving Crafts Turkey Nut Holder

Pencil
Egg carton
Scissors or X-acto knife
Tempera paint (brown or yellow)
4-inch pipe cleaner
Pushpin (optional)
2 googly eyes
Colored feathers (available at craft stores)
Glue stick
White paper
Toothpick
Marker

Time needed: Under 1 Hour
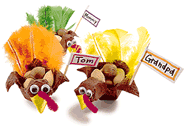
1. Draw a cut line around one of the cups in the egg carton. Then, cut along the line (a parent's job) and paint the cup.

2. Fold the pipe cleaner in half and twist the ends together to form a wattle. Push the exposed wire through the top of the turkey's beak until one third of the pipe cleaner is through the hole. (Tip: Stick a pushpin through the carton first.) To keep the wattle from slipping out, bend down the inserted end.

3. Glue on the googly eyes and feathers.

4. To make a name tag flag, cut out a strip of white paper. Cover one side with glue, then place a toothpick in the middle and fold the paper in half so the toothpick is glued inside. When the paper is dry, write on a name, then stick the toothpick through one side of the turkey, and the holder is ready to fill with nuts.

Sunday, November 05, 2006

Kid's Thanksgiving Crafts Turkey Napkin Ring

Kid's Thanksgiving Crafts Turkey Napkin Ring


Flat wooden craft spoons
Tempera or acrylic paints
Paper towel tube
Scissors
Orange pipe cleaners
Black marker
Tacky glue
Red felt

Time needed: Under 1 Hour
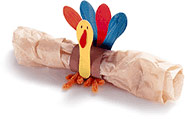
1. Five craft spoons are required for each ring. Using tempera paint, color one of them yellow for the turkey's head, the others, a variety of colors (they'll be used for tail feathers).

2. For the turkey's body, cut a 2-inch section from a cardboard paper towel tube and paint it brown.

3. From orange pipe cleaners, shape a pair of short legs with three-toed turkey feet. Fit the legs through small holes in the cardboard tube, bending the tips inside the tube to secure them.

4. Use a marker to draw eyes on the face and use tacky glue to attach a red felt wattle.

5. Finally, glue the head to the front of the body and the tail feathers to the back.

Kid's Thanksgiving Crafts Turkey Napkin Holder


Kid's Thanksgiving Crafts Turkey Napkin Holder
5- by 7-inch Colorful Poster Board
Craft Knife
Double-sided Tape
Glue Stick
2 Googly Eyes (available at craft stores)
Red and Yellow Construction Paper

Time needed: Under 1 Hour
1. Cut head and feet shapes in the top and bottom edges of a 5- by 7-inch rectangle of colorful poster board, leaving a 2- by 7-inch center band.

2. Use a craft knife to cut 2 wings near the center of the band.

3. Curl the cardboard by wrapping the ends of the band around something round, such as a rolling pin. Remove the band, overlap the ends, and secure them with double-sided tape.

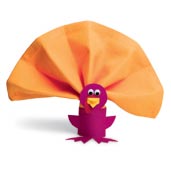
4. Use a glue stick to attach 2 googly eyes, a red paper wattle, and a yellow paper beak. To adorn each mini tom with fancy feathers, simply fold a colorful napkin accordion style and tuck it inside the ring.

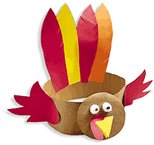
Kid's Thanksgiving Crafts Turkey Hat

Kid's Thanksgiving Crafts Turkey Hat


Scissors
Brown paper bags
Cardboard (cereal box)
Glue stick
Colored construction paper
2 small white pom-poms
Black permanent marker

Time needed: Under 1 Hour
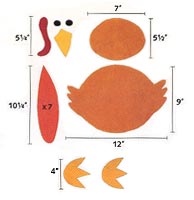
1. From the brown paper bags, cut a circle 3 1/2 inches in diameter for the turkey's head. Next, cut a 3-inch-wide band to fit around your child's head.

2. From the cardboard, cut a strip 5 by 1 1/2 inches to use for a neck. Fold it three times accordion style, then glue one end to the back of the paper circle.

3. For a beak, fold yellow construction paper and cut out a small double triangle (1 1/2 inches along the fold). Cut a rounded L from red paper for the turkey's wattle.

4. To create eyes, draw a black circle on each pom-pom with the marker. Glue the eyes, wattle and one side of the beak to the head. Let them dry. Then, glue the loose end of the neck to the center of the headband.

5. Now, wrap the headband around your child's head; mark where the ends overlap, then remove the band and glue the ends. Finally, glue on construction paper feathers and wings.

Kid's Thanksgiving Crafts Turkey Chair Slipcovers


Kid's Thanksgiving Crafts Turkey Chair Slipcovers


1. The Slipcover: This easy slipcover, made from a few yards of felt, serves as a backdrop for a year's worth of decorations.
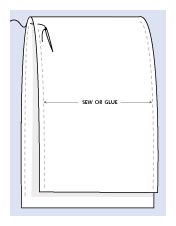
First, decide how far down the back of your chair you want the slipcover to hang. Measure from that point up and over the top of the chair, then down to the seat (or stop at the arms if your chair has them). This is the total length of felt you'll need for each cover. Now measure the width of the chair back at its widest point; add to that measurement the thickness of the chair back and 1 inch for the seams (1/2 inch per side).

2. For each chair, cut a piece of white felt to fit your measurements. Ours ran 1 1/2 yards long and 2/3 yard wide.

3. Fold the felt over the chair and pin the sides in place. Remove the cover and sew up the sides or glue them together with fabric glue. If you sew them, turn the cover inside out.

4. The Decorations
Young helpers will get a kick out of arranging the feathers on this pleasantly plump bird. Download turkey template 1, turkey template 2, and turkey template 3.
(To view the .pdf files, you'll need Adobe Reader which is available for free from the Adobe site.)

5. Once they're in place, stick on the rest of the turkey's body parts. Trace the templates on to felt (or other lightweight materials such as ribbon) and then cut them out. Dimensions will depend on the size of your chair covers.

6. Spray the back of each piece with a thin layer of repositionable glue, then press them onto the slipcovers or layer them on top of one another. (If little hands peel off any of them, just apply another layer of glue and press them back on.) Tip: If you get a clump of glue, spread it out with a paintbrush so it doesn't leave a mark on the white felt.

7. Store the pieces in plastic bags, preferably with the sticky sides facing away from one another. Next time you use them, spritz on another layer of glue.

Kid's Thanksgiving Crafts Turkey Candelabra


Kid's Thanksgiving Crafts Turkey Candelabra

Medium-size pumpkin without a stem
Large serving platter
Large kitchen knife
Large butternut squash with a stem
Wooden skewers, halved
Craft knife
2 dried black-eyed peas or other dried beans
Metal-tipped vegetable peeler
6 or more dripless or drip-resistant taper candles
Toothpicks
Sun-dried tomato

Time needed: Under 1 Hour
1. Prop the pumpkin at an angle on the platter so the top points up at a 45-degree slant. If it doesn't balance easily, use a knife to cut a slice from underneath to create a flat base.

2. Cut off the top 5 inches of a large butternut squash for the turkey head, then attach it to the top of the pumpkin with skewer halves. Use the tip of a vegetable peeler or a craft knife to dig out 2 small slits for the eyes and push a dried black-eyed pea into each slit.

3. Cut the sides from the bottom half of the butternut squash, then use a craft knife to cut V shapes into each piece for turkey toes. Set the feet in place on the platter.

4. Mark the candle holes toward the back of the pumpkin, at least an inch apart. Don't place them too far down the back; the candles should stick out at a slight angle, no more than 45 degrees, or they'll drip.

5. Use a craft knife or the tip of a vegetable peeler to cut the holes, making sure they are slightly smaller than the candles, for a snug fit. If you cut the holes too big, wrap tinfoil or a pipe cleaner around the base of each candle, then push it into the hole far enough so that it's stable.

6. For a wattle, bend a piece of sun-dried tomato over the top of the beak and, if necessary, secure it with a piece of toothpick.

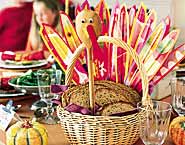
Kid's Thanksgiving Crafts Turkey Basket


Kid's Thanksgiving Crafts Turkey Basket

Large wooden spoon
Tacky glue and a glue stick
Pair of googly eyes
Pencil and scissors
Construction paper in a variety of colors
Flat wooden craft spoon
Red marker
Colorful printed wrapping paper or pages from old magazines
Waxed paper
Thin wooden skewers (sold in the kitchen/cooking section of most grocery and department stores)
Basket to serve as the turkey's body (it should be large enough to fit a loaf of bread or dinner rolls)
Florists' foam or Styrofoam block (sold at many large craft or department stores) large enough to wedge into the basket
Cloth dinner napkin

Time needed: About 1 Hour
1. To create the turkey's head, turn the large wooden spoon so that the back of the bowl becomes the face. Use tacky glue to stick on the googly eyes. Then cut out a yellow construction paper beak and glue it in place.

2. For the turkey's wattle, use the marker to color the flat wooden craft spoon red. Glue the wattle onto the face at an angle so that the top slightly overlaps the beak. You can use a pinch-style clothespin to hold the pieces in place until the glue dries.

3. From the construction paper, help your kids cut out lots of colored feathers that measure about 10 inches long and 1 3/4 inches across at the widest point. Cut out the same number of feathers from the wrapping paper or magazine pages, then trim them so that they are slightly smaller than the solid-colored ones.

4. Cover a flat work surface with waxed paper (this makes for easier cleanup after applying glue), and you're ready to assemble the feathers. For each one, place a construction paper cutout on the waxed paper and set a wooden skewer atop it so that the blunt end is just below the top of the paper and the pointed end extends about 3 inches below it.

5. Next, use a glue stick to coat the underside of a printed feather. Then press it, glued side down, onto the construction paper feather, sandwiching the skewer between the 2 layers.

6. Wedge the foam block into the basket (trim it first if necessary). Push the spoon handle into one end of the block deep enough to secure it. Stick the feathers into the opposite end. Cover the block with the cloth napkin, and the turkey basket is ready to fill with bread.

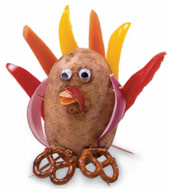
Kid's Thanksgiving Crafts Potato Turkey


Kid's Thanksgiving Crafts Potato Turkey

Large brown potatoes
• Toothpicks
• Assorted fresh and dried fruits, nuts, vegetables, and mini pretzel sticks and twists, for decorating
• Peanut butter
• Googly eyes (optional)

1. To stand each potato upright, create a tripod by pushing three toothpicks into the bottom, leaving 1/2 inch protruding (later, you can attach feet over the toothpicks to conceal them).

2. Designate the top of the potato as the head, or attach a separate, smaller potato head with toothpicks.

3. Put out an assortment of fresh and dried fruits, nuts, vegetables, and pretzels (see our list of suggestions, below). Let each child use toothpicks to attach soft items to the potato body. Attach hard items, like nuts and pretzels, with peanut butter. To add pistachio shells, cut small, curved slits into the potato and push them in. Stick on googly eyes with peanut butter.

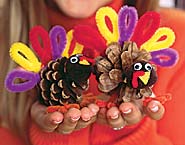
Kid's Thanksgiving Crafts Pinecone Turkey


Yellow and red felt
Tacky glue
Googly eyes
Brown pom-poms
Pinecones
Pipe cleaners

Time needed: Under 1 Hour
1. For each turkey, cut out a yellow beak and a red wattle from felt. Then glue the beak, wattle, and a pair of googly eyes onto a pom-pom to create the turkey's head.

2. Glue the pom-pom head to the tip of a pinecone. Allow the glue to dry.

3. Wrap a pipe cleaner around the middle of the turkey's cone body, starting from the top and twisting it together a few times on the underside. Separate the ends of the pipe cleaner (below the twists) and bend each tip into a 3-toed foot.

4. For the turkey's tail, individually wrap 3 or 4 pipe cleaners around the back of the pinecone, starting from the underside and twisting them together a few times on the top of the pinecone to secure them. Then loop both ends of each pipe cleaner to shape tail feathers.

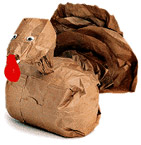
Kids Thanksgiving Crafts Paper Bag Turkey


Kids Thanksgiving Crafts Paper Bag Turkey

Scissors
Medium-sized brown bag
Newspaper
Glue
Googly eyes
Red balloon
Two large grocery bags
Large rubber band

Time needed: Under 1 Hour
1. To make the head, stuff the bottom of the medium-sized bag with balled-up newspaper. Twist the top of the bag to form a long, skinny neck.

2. Glue the googly eyes and the balloon wattle onto the face.

3. For the turkey's body, use one large bag. Snip a hole through the front of the bag an inch from the bottom and fit the neck into it. Then, stuff the body two thirds full with newspaper. Close the top of the bag with the rubber band.

4. To make tail feathers, cut four large half-circles from the remaining bag and then glue them in layers to the back of the body.

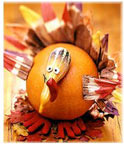
Kid's Thanksgiving Crafts Gourd Centerpiece


Kid's Thanksgiving Crafts Gourd Centerpiece

Gourd
Round toothpicks
Pumpkin
Red chili pepper
Orange rind
Cloves
Corn husks or tamale wrappers
Tempera paints
Pair of red gloves

Time needed: Under 1 Hour
1. To create the turkey's face, push a few toothpicks halfway into one side of the gourd, then attach it to the pumpkin by pushing the protruding toothpick ends through the pumpkin shell. Use the same method to attach the chili-pepper wattle.

2. For eyes, use two orange-rind circles. Push a clove through the center of each one and into the gourd.

3. Next, tint the corn husk feathers by dipping them into diluted tempera paints (2 parts water to 1 part paint) and attach them to the pumpkin with toothpicks.

4. Set the completed pumpkin atop the red gloves so that the fingers resemble turkey feet.

Kids Thanksgiving Crafts Turkey Balloon


2 round red balloons
1 oblong yellow balloon
Scissors and cardboard
Masking tape
Acrylic paint and brushes

Time needed: Under 1 Hour
1. Blow up a red balloon and knot off the end to form the turkey's body.

2. To make the head, blow up the yellow balloon about halfway so that there's an uninflated "nose" at one end, then knot off the balloon. Tie an uninflated red balloon to the nose to make the turkey's wattle.

3. Attach the knotted-off ends of the body and the head together by wrapping a rubber band around them.

4. Cut the feet out of one piece of cardboard and attach them to the bottom of the turkey with masking tape. Now your child can dress up her bird, painting on a face and feathers.

5. After they make a few turkey balloons, kids can hold a race to see who can bop theirs across the room first. The winner gets the real turkey's wishbone.